
UPDATE: 11-Dec-2015 For anybody searching for an Instruction Manual / User Guide for the Delta OL-1000 Overlocker (Serger) machine, please check out my blog post here thank you :-).
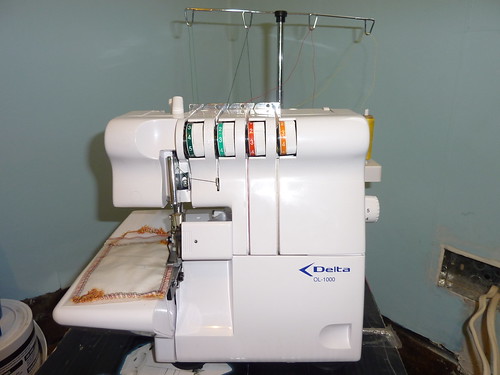 |
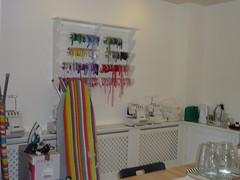
| My 'Delta OL-1000 Overlocker' (Serger) straight out of the box new. (More pics here) |
I've been spurred onto this by a number of things:
a) I bought the darned thing before Christmas last year (errmm... hello it's nearly 8 months later and I've only taken it out of the box a measly once to check nothing was missing).
b) I've bought umpteen number of books + DVD on the subject of serging/overlocking
c) Everyone else is diving on into the overlocking swimming pool with either first-time machines (Karen, Catherine, Patty, Tilly, Vicki) or replacement machines (Kristy). Whereas, I've not even dipped my toes into the metaphorical shallow-end - instead I'm doing a great impression of a water-phobic chicken :( !!
So... after seeing Karen's post about her new Brother Overlocker, I thought it was high time to inflatable my armbands and leap get my feet wet. I dropped the lovely Karen a quick email, suggesting that the both of us as newbies to overlocking get ourselves onto a short evening class to learn the basics, like threading, tension adjustments etc..
So, this evening (technically yesterday evening, but I haven't gone to bed yet so whatev' LOL!) we met up at The Make Lounge in Islington where we had booked onto their short class, described as:
" Overlocking Made Easy Class
• Level: All
• Course length: One 2-hour session
With their ability to simultaneously cut and stitch a hem, overlocking machines are incredibly useful for decorating, reinforcing and constructing garments and other items. But they can be a bit intimidating!
In this 2-hour workshop, we’ll demystify the overlocker by teaching you how to thread, adjust tension and differential feed, and deal with corners and curves. You’ll leave the workshop with a pair of rolled hem napkins you’ve made yourself, in your choice of more than 100 gorgeous solid or printed fabrics! "
Now, the lovely thing is, I'd phoned them up last week to ask if we could bring along our own machines to the class (the answer was yes - I just had to remember to bring the power lead, and the manual). My reasoning was that even though they provide their own onsite machines for students, if I am new to all of this overlocking lark, then I want to learn the ins the outs, the tweaks, tips 'n' tricks on my own machine - afterall it is what I'll be using afterwards at home isn't it? So, I managed to lug my machine (I kept it in the box / packaging I bought it with for extra protection) all the way to work wrapped in one of my many trusty IKEA big blue bags that keep in the house (LOL!) to ward of the raindrops and stuffed into a strong trolley. Karen also decided wheelie-was-best, and brought her overlocker in a pull along suitcase (sensible lass!)

Image Source: http://www.ikea.com/gb/en/catalog/products/17228340
"Oh, IKEA FRAKTA bag... for 40p is there nothing awkward or heavy that you CANNOT carry ;) ?"
"Oh, IKEA FRAKTA bag... for 40p is there nothing awkward or heavy that you CANNOT carry ;) ?"
EDIT: If you are able to take your own overlocker machine to a class then:
a) make sure you take the pedal, power cable, manual and any tools/tweezers/extra needle plates/screwdrivers that come with it along with you too!
b) check the manual for how/where to adjust your differential feed (and check that the dial/thumbscrew will move - if like mine the thumbscrew won't budge at all, try some pliers at home before you attend the class to save yourself trouble on the night)
c) if at all possible forward a PDF copy (or a web-link to find it) to your teacher in advance. Then they can familiarise themselves with your model before you arrive, and be in the best position to assist you.
I didn't do b) or c) but Suzanne managed admirably. Though I think things would have gone easier for me if I'd done b), and I'm sure c) would've been useful to Suzanne too :). I photocopied the threading pages from my black and white manual and coloured them in to match my thread colours before the class - and that helped me loads with the threading :)!
The nice people at 'The Make Lounge' actually provide drinks and snacks for us - very civilized I must say! Plus, there were only 4 students in total on the night (the maximum they run with is 10) - so we had loads of time with our teacher to pester her with questions.
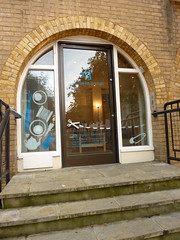
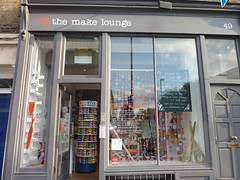
Outside of 'The Make Lounge' at Venue 2:
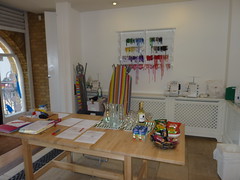
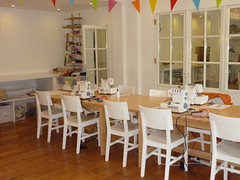
Inside of our class room:
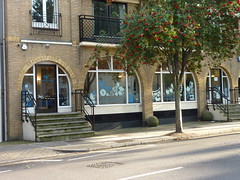
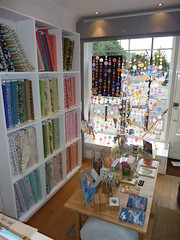
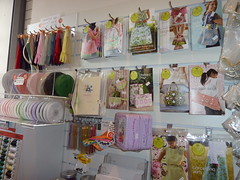
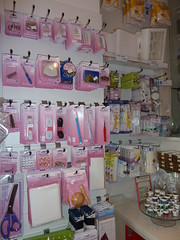
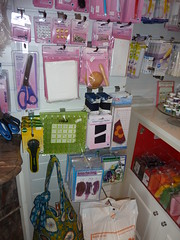
And, here's their shop a few doors down on the same road (where we picked out our napkin fabric).
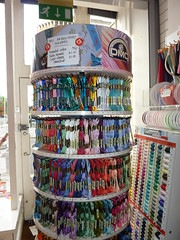
I'd decided to bring my own cones of thread with me in blue, green, red, and yellow. The colours to match the dials on my machine (which strangely don't tally between the machine itself and the manual, but that's a topic for a different post) - and I reasoned that I'd more easily be able to spot problems with tension and threading if I could discern which coloured thread belonged where :)
My cones of thread came courtesy of some eBay purchasing months ago (SEEEEE!! I WAS getting ready to do some overlocking hehe! I just hadn't gotten around to starting anything as yet ;)! )
My cones of thread came courtesy of some eBay purchasing months ago (SEEEEE!! I WAS getting ready to do some overlocking hehe! I just hadn't gotten around to starting anything as yet ;)! )
Our fab teacher was Suzanne Cowan, Suzanne was a beacon of knowledge, calmness and light for us. (Plus, Chloe was pretty darn lovely too - opening up their store down the road to help us to select and cut our fabric choices for our napkins making.)
" Suzanne Cowan has been involved in both book arts and fashion design for over 10 years. As a bookbinder she has travelled throughout Canada, the United States, and Taiwan teaching bookbinding to people of all ages while maintaining an online store and gallery featuring her own book works. With a formal education in both textile and fashion arts, Suzanne is well versed in the art of fabric manipulation as well as fashion illustration, patternmaking, and garment construction and has sold her clothing at a variety of boutiques throughout Canada."
I had some trouble adjusting the tension on my machine for very light weight cotton samples (the class provided us with plenty of swatches for practice). And, with Suzanne's help I got it to work great doing a basic stitch on medium weight cottons. We worked out that my differential feed (adjustable on my model via a thumbscrew behind the looper cover) needed tweaking. However, as I'd not tested my machine before attending the course, I didn't know that the darned thing was stuck and I couldn't budge it for love nor money :( We even tried some jewellery pliers they had in the storage for other classes on it but no dice! I'll try again this weekend with the strong houshold pliers in our toolbox at home!! And, the needle-plate screw didn't fit my screw-driver *sighs* so I couldn't practice rolled-hems on my own machine, as I needed to change the plate to do it :(
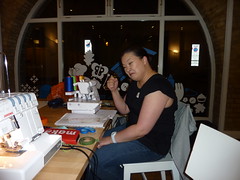 |
| Shaking my fist at my uncooperative overlocker |
Here's a picture of my finished napkins :) I think they'll be great for a picnic in the park when the sunshine returns ;)!
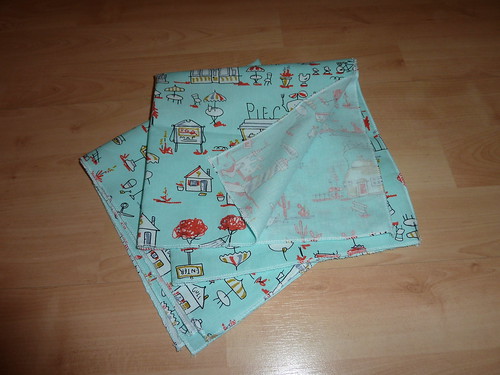 |
| My finished napkins - complete with rolled hems! |
So, as soon as the grand sewing-room makeover is finished (Hubby and I reckon by end of the 2nd week in September - fingers-crossed!). I shall try my hand at a simple T-Shirt, maybe one of these FREE patterns by pixelink on BurdaStyle which I've already downloaded and printed-off in readiness.
 |
| Batwing Top by pixelink |
 |
| 1 piece Kimono Tee by pixelink |
P.S. I wantto give a big shout out to Michelle (thanks for playing tug-o-war with me and my trolley, to extract my machine from it's box LOL!) - I hope you find somewhere that'll service your Pfaff! And to Georgina (Georgia ?) I hope you get to grips with your Juki, if not sell her on eBay and upgrade to a nice shiney new model I say :)


.jpg)


.JPG)


.jpg)


Sounds like a neat class! Glad that you got to go and have someone show you the ropes. And good thinking using the different colors of threads!
ReplyDeleteOnce you get the hang of it, you'll love your serger. :) I have a Babylock Imagine, and while I sometimes wish I had the coverstitch feature, I still love it. Serging makes sewing with knits a breeze. :)
When I first got my overlocker after Christmas I was a bit worried about threading. After a couple of times I got the hang of it and now I don't mind doing it at all. I don't even use the knotting threads trick, I simply re-thread it from scratch. One thing I found out about three-thread rolled hem is that you need to take out the left needle otherwise you get a wonky stitch (don't know if this applies to all overlocker, but it was driving me crazy... so I though I'd share the info). Can't wait to see the new top
ReplyDeleteThanks so much - it was a truly great night. What fun!
ReplyDeleteNice reading both yours and "Did you make that?" Karen's posts about the same class!! Sounds really good fun as well as useful! The overlocker is a dream at the moment! Can't wait to see the fruits of your labours over the non-cooperating overlocker! :-)
ReplyDeleteOh, I do hope you are in and swimming, now! My overlocker is so terribly basic (but then you know that ;) ) that I am always jealous of what modern ones can do... You will have so much fun!
ReplyDeleteI just caught up on your blog posts (I'm so behind! :( ) and it was neat to read about your mom's sewing. Reminds me a bit of my relationship with my father (which is also distant). Apparently he was an accomplished pianist as a youth and played at their church---I never knew he even played and to this day haven't seen him touch a musical instrument of any kind...
Sounds like you had a terrific time and can't wait to see both your t-shirts and your revamped sewing room.
ReplyDeleteHad to smile. I have the same machine, bought about 12 months ago (or maybe more) and have only just decided to beard it in its den. Yes, I agree, the instructions about orange and yellow are confusing when you are presented with red and orange. Mine came ready threaded with the green thread on the left (going through the blue tension plates) and the blue thread on the right (going through the green tension plates). Having the threading diagrams in black and white not terribly helpful either!! My problem is that I can't get the wheel to turn at all - seems to be jammed solid. Was yours fixed somehow for transportation? Just wondering whether or not to loosen the screw in the middle of the wheel, or whether that will cause a disaster.
ReplyDeleteHow do u thred the needles before it goes threw the window I can't eve vin make a old sock
ReplyDelete