
(I'm paraphrasing "A hop, a skip and a jump")
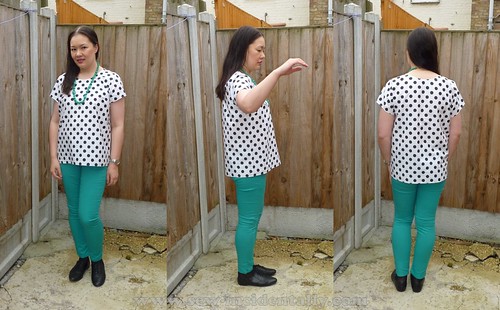
The TOP is my 2nd finished Scout Woven Tee by Grainline, I successfully finished it in time on Sunday evening (just over a week ago), and wore it to work to show-off on Monday 23rd July.

I made this with fabric kindly donated by Alana from Lazy Stitching at the April 2012 Walthamstow meet-up.
I managed to squeeze it onto barely 1 metre of fabric - and I'm quite proud of my pattern matching of the spots/dots around the side-seams, and tops of sleeves. I think the spots flow quite naturally, and don't look randomly cut-off or anything weird LOL!
Check out the early-morning photos I made poor Hubby take whilst my maquillage was all fresh before leaving for work hehe! (P.S. That's shower-fresh damp hair, not greasy strands alright ;)!!)
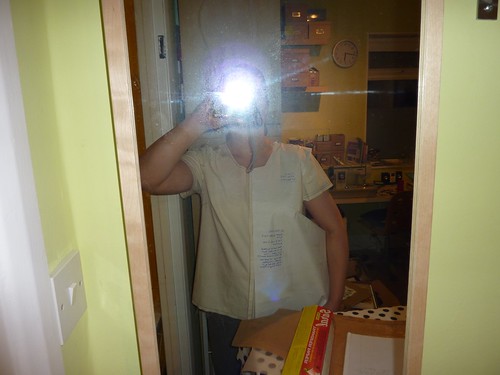
I wanted to find my exact "real" BP, so I could avoid placing any of the black polka dots from my chosen fabric over the bulls-eye! I used my top-tip to avoid dodgy placement of the dots over the "girls" ;).
Then, I stitched it in place on my sewing machine. I had the top the right-way out (not inside out) and then stitched inside of the neckline - so I could see that I was catching the edge properly of the bias binding. This means that the bobbin thread appears on the outside of the neckline, and the thread from the spool/reel shows on the inside of the neckline.
Oh, and I used the new overlocker that my wonderful Hubby bought for me early this year for my Birthday (I was having trouble adjusting the tension on my old machine) to finish the seams on the inside. Handily it came pre-threaded with 4 mini-cones of white thread, so that saved me some time - but I did have a go at re-threading it and it was MUCH faster than my old Delta overlocker. I straight stitched all the seams first, and then overlocked (serged) them - I don't trust my judgement enough yet to just overlock them straight off. It was a bit slow going around the armscye seams - probably because it's such a curved line to follow, and I was worried about accidentally cutting off bits I shouldn't be with the machine's blade. But I was careful and it turned out great!
I also used seam tape to stay the shoulder seams before I overlocked them too.
The SKIP is... skipped stitches, I got trying to zig-zag stitch the side-seams on my first attempt at Zoe's FREE vest pattern.
P.S. If you haven't heard of this fab little pattern - where have you been hiding ;) ? I might be biased - but download it now and give it a go! It was my first try at sewing with knits (unless you count taking in the side-seams of T-shirts with glorious abandon for the ripped straight stitches that don't give - when I was a teenager haha!), and aside from the skipped stitches (hmmm... which I think are related to pressure issues with my presser-foot) it went together really quickly!
The the JUMP is the frightful jump I got when sewing my vest using my 'Walking Foot' and the needle snapped - eekk!
I managed to squeeze it onto barely 1 metre of fabric - and I'm quite proud of my pattern matching of the spots/dots around the side-seams, and tops of sleeves. I think the spots flow quite naturally, and don't look randomly cut-off or anything weird LOL!
Check out the early-morning photos I made poor Hubby take whilst my maquillage was all fresh before leaving for work hehe! (P.S. That's shower-fresh damp hair, not greasy strands alright ;)!!)
Following on from the details in my previous post... I stitched shoulder-seams, followed by side-seams, then the underarm seam on the sleeves, followed by setting-in the sleeves. I made the same mistake as on my first navy collared version of the top - in that I forgot to hem the sleeves before sewing them to the bodice (doh!) - it made it a little more bulky to manoeuvre under the presser foot but not impossible. I was careful when I altered the sleeve pattern to measure the curves along the armscye of the sleeve verses the bodice armhole - as I didn't want to have to contend with too much excess ease along the sleeve cap (I found it hard to ease this in evenly on the first toile / muslin I made). So, with less than ½" (1.3cm) of ease in the sleeve cap I first pinned the sleeve to the bodice between the notch marks along the lower edge of the fabric (aligning the stitching lines I'd marked on the wrong-side of my fabric using my Saral tracing paper) then I pinned between the notches along the top of the sleeve - distributing the ease evenly. Now, the first time I tried to sew a set-in sleeve it was tricky having to constantly stop 'n' start to remove the pins as I went along. So instead, I basted by hand with some bright red thread - about 1/8" (3mm) from the marked stitching line. I basted to the side of the line that was towards the bodice - so not in the seam allowance itself. I figured that basting on that side would control any tricky ease and awkward curves better than if they were stitched together in the seam allowance area.
I pinned the bodice front pattern to my toile / muslin at the shoulder and underarm/side-seam, and centre-front neckline. Then I use a pencil to mark on the paper my "actual" BP (Bust Point / Bust Apex).
I pinned the bodice front pattern to my toile / muslin at the shoulder and underarm/side-seam, and centre-front neckline. Then I use a pencil to mark on the paper my "actual" BP (Bust Point / Bust Apex).
I wanted to find my exact "real" BP, so I could avoid placing any of the black polka dots from my chosen fabric over the bulls-eye! I used my top-tip to avoid dodgy placement of the dots over the "girls" ;).
I followed Jen's tutorial "Getting Flat Bias Necklines" to the tee! I worked really well, and I will definitely use it again!
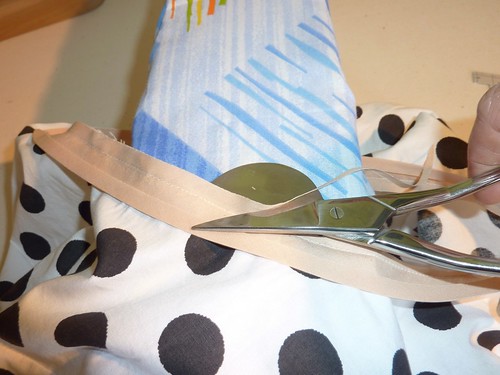 |
| Trimming / grading the seam allowance |
I cut the bias binding length as follows:
Length of Actual Piece of Binding to Cut =
*Neckline Length + (2x Seam Allowance), then minus 1/8" (3mm)
(*At seam line / stitching line - NOT at fabric edge!!)
Length of Actual Piece of Binding to Cut =
*Neckline Length + (2x Seam Allowance), then minus 1/8" (3mm)
(*At seam line / stitching line - NOT at fabric edge!!)
I used my duck-billed applique scissors to grade/trim the seam allowances, and I was pleasantly surprised as they really did help to avoid inadvertently trimming the bodice fabric underneath by mistake (something I've struggled with using normal shears/scissors in the past). As you can see from the photo above the
bias binding got trimmed down in half to 1/8" (3mm).
I used some nude/ skin-toned bias binding (it kinda matched for my own skin tone) to face the inside of the neckline - I picked it up at Shepherd's Bush Market when I went out with Dibs recently. I think it worked pretty well! I didn't want an extra thick doubled-up effect you sometimes get with 2 or more layers of white fabric!
I used some nude/ skin-toned bias binding (it kinda matched for my own skin tone) to face the inside of the neckline - I picked it up at Shepherd's Bush Market when I went out with Dibs recently. I think it worked pretty well! I didn't want an extra thick doubled-up effect you sometimes get with 2 or more layers of white fabric!
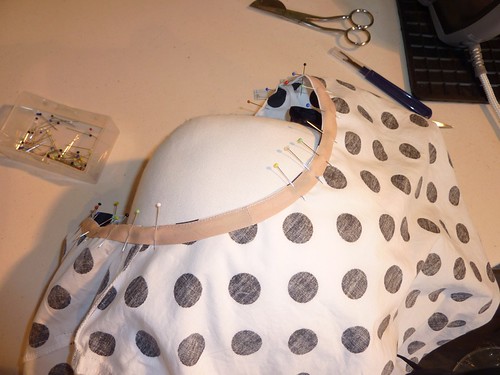 |
| Pinning and Pressing Bias Binding Inside the Neckline on my Tailor's Ham |
The bias binding is then turned to the inside. I pinned it carefully
in place and pressed it between the pins (avoiding pressing over the
glass head pins - which can leave marks of the pin holes in the fabric
otherwise!). My homemade tailor's ham was very handy in laying out the neckline during this process - as it mimicked the natural contours of a real body well :)
Then, I hand basted in place close to the bottom edge of the binding (not so close as to catch in the machine stitches later).
Then, I hand basted in place close to the bottom edge of the binding (not so close as to catch in the machine stitches later).
Then, I stitched it in place on my sewing machine. I had the top the right-way out (not inside out) and then stitched inside of the neckline - so I could see that I was catching the edge properly of the bias binding. This means that the bobbin thread appears on the outside of the neckline, and the thread from the spool/reel shows on the inside of the neckline.
 |
| The finished neckline - lies lovely & flat! |
I also used seam tape to stay the shoulder seams before I overlocked them too.
The SKIP is... skipped stitches, I got trying to zig-zag stitch the side-seams on my first attempt at Zoe's FREE vest pattern.
 |
| Opps - can we say "Skipped stitches?" |
P.S. If you haven't heard of this fab little pattern - where have you been hiding ;) ? I might be biased - but download it now and give it a go! It was my first try at sewing with knits (unless you count taking in the side-seams of T-shirts with glorious abandon for the ripped straight stitches that don't give - when I was a teenager haha!), and aside from the skipped stitches (hmmm... which I think are related to pressure issues with my presser-foot) it went together really quickly!
The the JUMP is the frightful jump I got when sewing my vest using my 'Walking Foot' and the needle snapped - eekk!
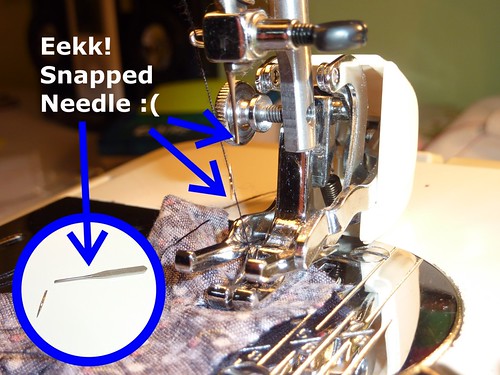 |
| What's wrong with this picture :( ??? |


.jpg)


.JPG)


.jpg)


Great Grainline tee - I love that pattern. It's just such a great wardrobe beasic! Love the polkadots too.
ReplyDeleteI've downloaded Zoe's vest pattern but haven't got round to making it up yet - too many other things on the list. As for the snapped needle - glad to see I'm not the only one this happend to - I managed to snap 2 needles and a pin sewing up my last cotton sundress - not sure how that happened but it's very annoying!
It looks great paired with those turquoise trousers. Very fun!
ReplyDeleteoh the things I would gladly give up to have that smoth looking bias faced neckline. I am hopefully going to work on Zoe's tshirt tonight.
ReplyDelete