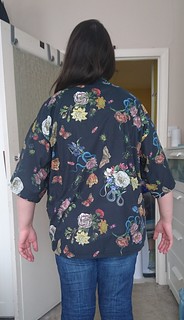
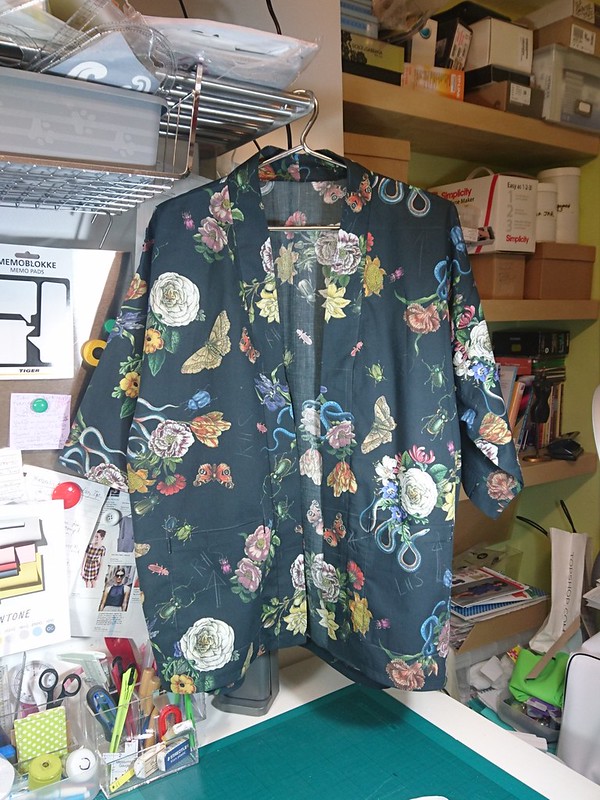
Did
anyone spot the super-pretty, floaty Kimono
style jacket that Josie (the Fabric
Godmother) was wearing
in the pics from my last post? Yeah, I kinda
wanted in on some of that fab 'n' floaty action!
It was
appealing to me because of it's open front, easy to wear shape. It's boxy (on paper) yet has a fluid drapey style, and thatsimple
construction... all equals minimal fit issues, and hopefully a quick make!
Tracey
(@dalekdoctor on IG) spotted the same pic
on my Instagram feed and she
fell in love with the jacket too. So, I asked Josie where she got the pattern
from, and a long story short...we've both now made it! So please find below is
my review of the pattern.
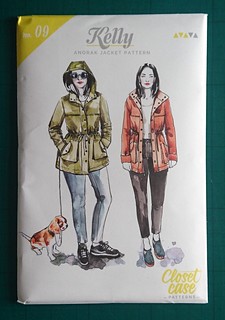
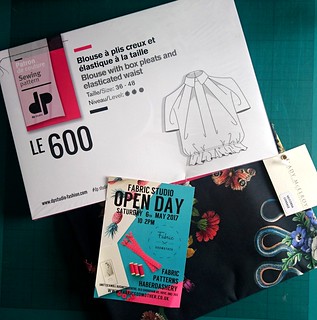
Pattern Number: Issue
19, Kimono Jacket (published
in October 2015).There is no pattern number, it's the FREE paper template
provided inside of the magazine (sorry no downloads - but you might be able
to buy it as a back issue?).
Pattern Size Range: The pattern comes in a
multi-size pattern (NB: the pattern does not come with either body or finished
measurements). The 3 sizes Small (8-10), Medium (12-14), Large (16-18) are
given for UK RTW sizes.
Pattern Size Made: I made the Large size.
My body measurements are as follows, I usually wear UK RTW size 18 in tops.
Height: 5ft 7" (170cm)
Full Bust: 41"-42" (104cm-106.7cm)
Waist: 37" (94cm)
Hips: 41½" (105.4cm)
My figure type is BRICK (square, or rectangle haha!).
How I Rate this Pattern:
(1 - Low, 5 - High)
Size Range - 3.
Instructions - 4 (would've been a 5, if it had given alternative techniques to French seams, bias binding the hem, and for Hong Kong finishing - see my explanation further below).
Construction Process - 4.
Final Fit - 5.
Overall Rating - 4, great fit, easy to make, easy to wear. Would've been a 5 if neckline didn't need trimming + see comments above re: instructions too.
Recommended for: Based on the pattern instructions, I would recommend this pattern for Advanced Beginners upwards.
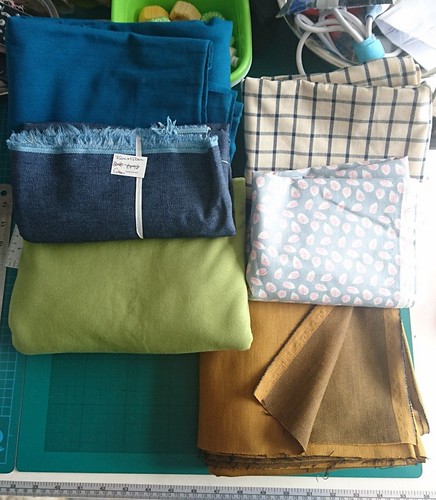
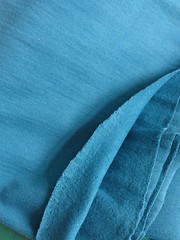
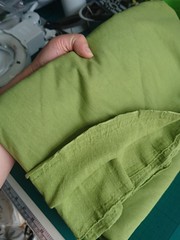
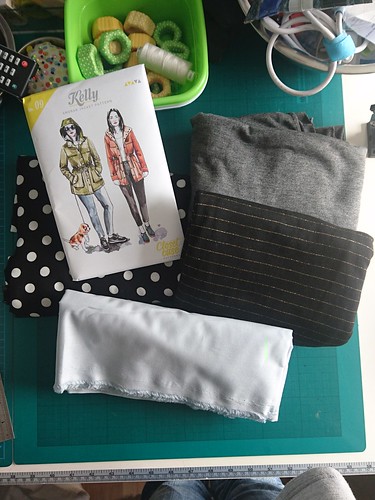
Fabric from Stash: Yes - it was less than
a week old into my possession when I cut into it!
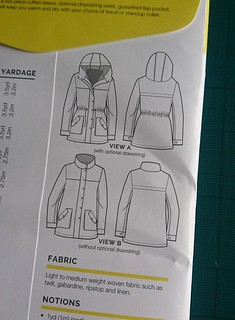
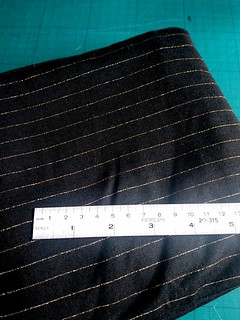
Fabric Used: I used 2m, of 144cm
wide lightweight Cotton Lawn, it pre-washed beautifully (no fading, minimal shrinkage),
drapes so well, and is perfect for this project as it pressed and handled so
well. The pattern asks for 1.5m of 150cm wide wool-mix tweed fabric - I used up more fabric than they recommended to match the printed designs carefully.
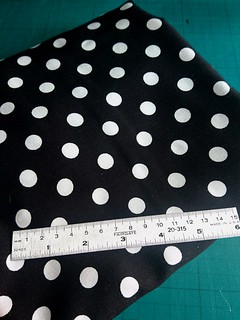
Fabric
Source: Cobra Corsage Cotton Lawn - Black (£15.00/m) from Fabric Godmother (this was kindly gifted
to a bunch of us who visited Josie's unit on 29th April).
Notions: Matching thread,
fusible stay-tape and lightweight fusible knit (tricot) interfacing, Wonder Tape (to match up fabric pin-free) - all from my stash. The pattern asks only for threads, and 3m of bias binding (it doesn't state what width of binding). The binding is used for hemming and Hong Kong finishing the insides. I didn't use those techniques so I didn't need any bias binding (yay!).
Did
you use any Tips/Techniques in this pattern?: Yup! I did French Seam the shoulder seams as per the instructions. The pattern instructs you to stitch WS together at 0.75cm,
trim down SA to 0.5cm, then turn RS out, press, then
stitch RS together at 0.75cm.
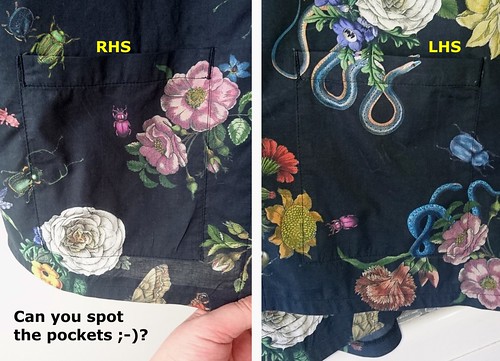
I decided that I wanted to have the fabric's print designs match beautifully across my jacket. So, I wanted the front bands to match one another across my CF, and that they match also match across the seams joining the bands to the front bodice. And, as a bonus I had enough fabric left to pattern-match the pockets too!
As the lower-half of the front bands/bodice edges run straight upwards (at 90 degrees to the hemline) those areas were pretty easy to pattern-match fabric to one another. But, from about BP level up to the shoulder seam, the edges of the bodice opening gently slopes diagonally towards the sides of the neck/SNP. So, I just concentrated on matching the fabric on the band to the lower straight-portion of the jacket opening, and then I just allowed the fabric design to do it's own thing from there on upwards.
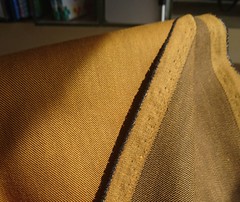
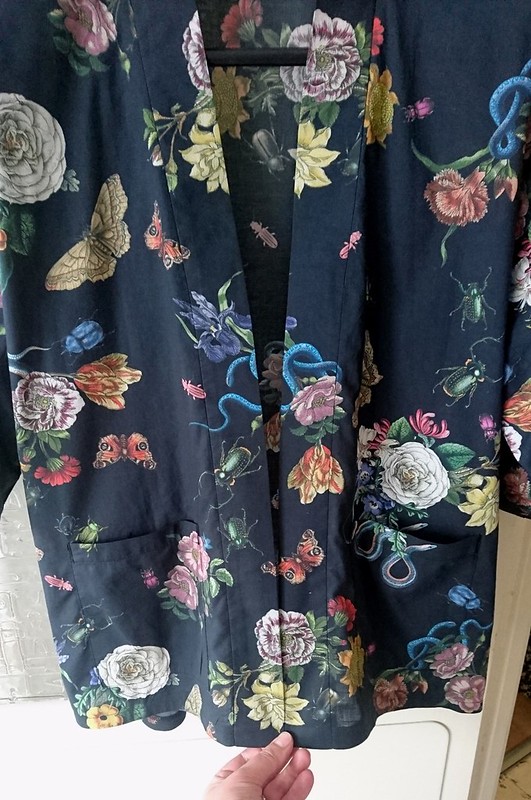 |
Look at that lovely fabric pattern-matching folks!
Bodice to Bands, and all the way L-R across the CF too. |
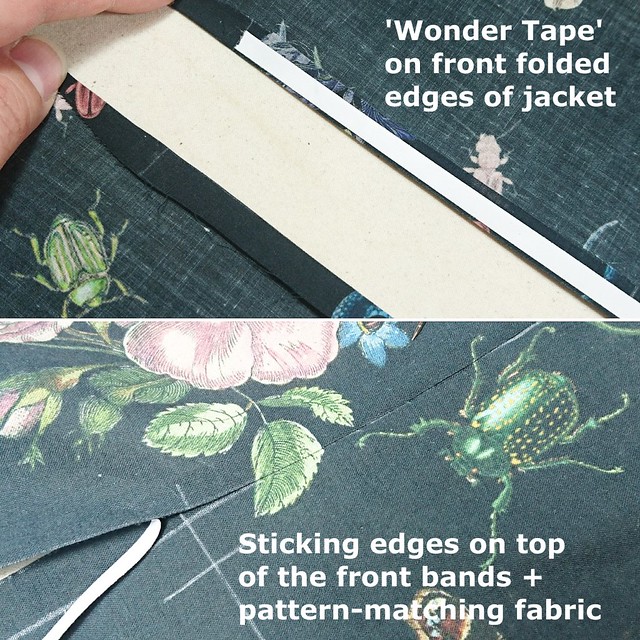
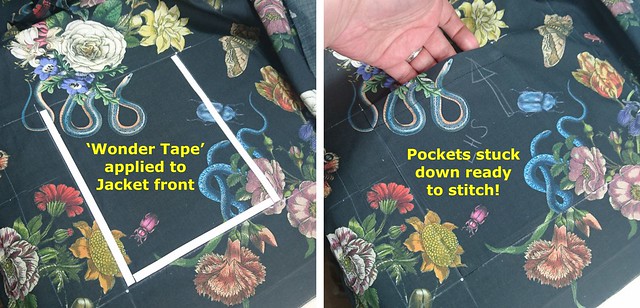
I used my water-soluble adhesive 'Wonder Tape' to help me to align the fabric up for a great finish on the pattern-matching:
1⃣ I press a crease (along the 1cm SA) folding the fabric RS to WS on the bodice
front opening.
2⃣ Apply tape close to crease edge on WS of bodice.
3⃣ Removing tape a small section at a time - align print/pattern design of bodice front
onto the same design areas of the band.
4⃣ Once band is fully in place - lightly press open crease from WS.
5⃣ Stitch into place.
6️⃣ Grade/trim the SA to reduce bulk.
Did
it look like the photo/drawing on the pattern envelope once you were done
sewing with it?: Yes, whilst there is no technical pattern drawing in the magazine - there are clear photos on a model. And, I'm very pleased with how closely my version resembles theirs - especially as my fabric choice was different. The magazine recommends a wool-mix tweed, and I used a lighter weight fabric (Cotton Lawn).
Were the instructions easy to follow?:
The instructions were fine, it's a really simple design garment so there's very little that's complicated to follow (hence I recommend it for Advanced Beginners).
The constructions order in the instructions reads (summarised by me):
1. French seam shoulders together.
2. Attach sleeve heads to bodice, and Hong Kong finish those edges.
3. Stitch underarm and side-seams together, and Hong Kong finish.
4. Hem bodice using bias binding, fold to WS and topstitch into place.
5. Join the 2 front band strips together, press open seam.
6. Fold, and press over 1cm along one long edge of the (joined) front band.
RS together, pin unfolded edge of band to front opening of bodice.
7. Stitch all around the front edge to attach band to bodice.
At short ends of the bands, fold in half vertically RS together.
8. Stitch across short ends of the band (on both L + R sides). Trim SA
and turn RS out.
9. Press band in half vertically all the way around, hand stitch the pressed-
edge to inside of jacket.
10. Finish raw edges of the pockets, hem their top edges.
11. Fold and press remaining edges of pockets, pin and stitch to jacket front.
12. Fold, press and topstitch sleeve hems into place.
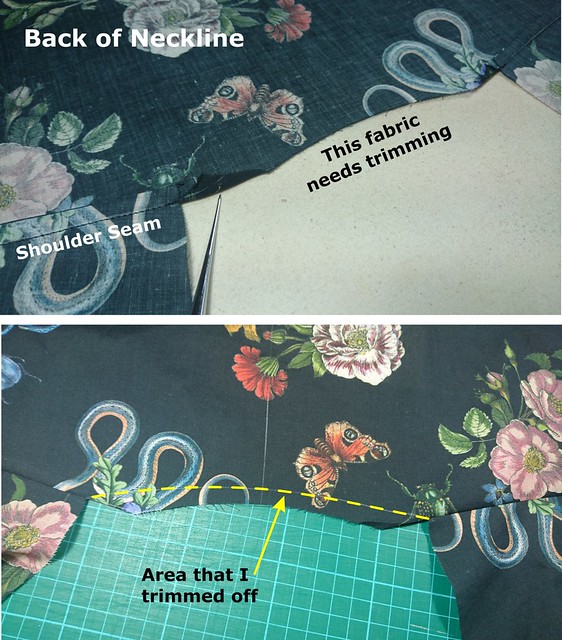
I had a small issue with the drafting of the back neckline - which I'll talk about further below.
What
did you particularly like or dislike about the pattern?:
I like the simple style, and *relatively quick construction of this pattern.
It didn't affect me - but it might confuse some beginners, but only the front pattern piece has the grainline marked. The back piece - it will be parallel to the CB fold line for cutting the fabric + the same for the sleeve piece - grainline is same as the foldline. For Front Band piece and pocket - it runs in line with the long edges.
I didn't like some of the *lengthy techniques suggested, and I believe that the alternatives that I used below saved me a tonne of time instead:
- French seaming the shoulders - this worked for my own fabric choice (a lightweight
Cotton Lawn). But, it seems odd to me to use such a bulky technique to use for tweed! So,
I would rather just straight-stitch the shoulders at 1.5cm and then overlock (serge) them to
both trim down the SA and to neatly finish the raw edges at the same time.
- Hong Kong finishing - this is suggested for along the SA on the top of the sleeve, and
also for the underarm/side-seams the. Again, on my make (and on future versions) I just
stitched, then overlocked the SAs.
- Hand stitching the insides of the front bands - at step 8. (after stitching across short
ends of the band - which I choose to do at 2cm from the raw-edges). I didn't fold under
1cm and hand stitch the band into place inside (which is what the instructions say). Instead
I folded my bands vertically over a tiny bit more than half to the inside (about ¼" /6mm
extra). I had already overlocked what would've been the hand-stitched edge. I then pressed
the all along the folded band, pinned it in place from the front - ensuring that the ¼"
overlapped the existing seam line between the band and the bodice front. Then, I (carefully!)
stitched it in the ditch along that seam line! Job done, and much faster than game stitching
it!
- No grading of SA for front bands is suggested - at step 7. I choose to grade my SA (even
though I could've avoided this as I was using such a lightweight fabric). If you use a bulky
fabric (like the suggested wool mix tweed), I'd recommend grading your SAs where
possible, as you'll get a nicer, smoother, less bulky finish in the end! I also trimmed the
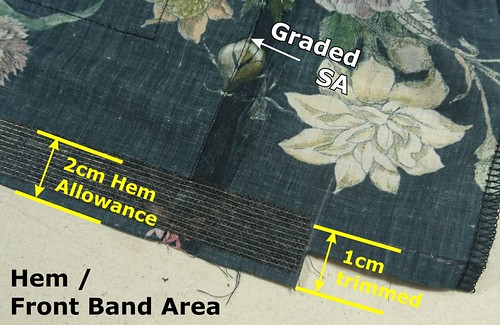
- Bias Binding the bodice hems - I didn't hem the jacket that way, instead at step 4. I
overlocked the raw hem edges (without trimming any extra fabric off). Then, (after
stitching in the ditch at) step 8. and with the band turned RS out I pressed the hem
up by up 2cm and topstitched it in place from RS.
- Clipping SA on shoulder/neckline area - at step 9. the instructions do not ask you to clip
the SA around this curved area for the bands/neckline (but IMHO they should!). It made
everything lay down, and press more smoothly into place for when I stitched in the ditch to
finish the front bands. If you do clip - do what I did, I shortened my stitch length on the
seams for those areas, to strengthen them. And, then I clipped up to but not through the
stitch-line.
What challenges did you have?:
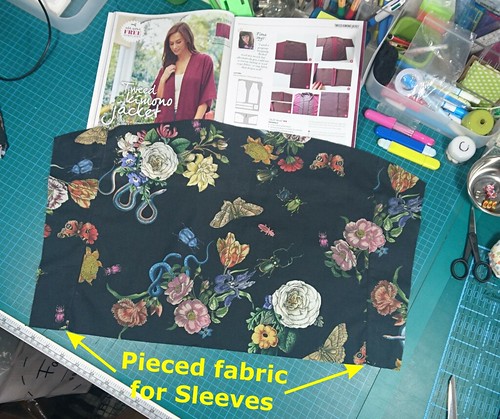
Because, earlier during my cutting out I had been so preoccupied with getting perfectly matched fabric on the long front band pieces - that I had (stupidly) forgotten to take in account fabric needed to cut out my 2 sleeves (doh!).
So, I had to piece together for the sleeves - ran out of fabric any wide-enough pieces (yes I ran out, even though I had 2m of fabric, 50cm more than the pattern called for haha!). It was my own fault - but hey, mistakes happen!
So, I pieced together fabric, and I matched the shapes/colours across the joins as best as I couldn't for the sleeves.
I decided to create a 3 piece sleeve = A + Centre + B. (A + B are the same of course ;-)!) And, then I added on seam-allowances where I'd sliced up the sleeve to fit onto the fabric pieces that I had left.
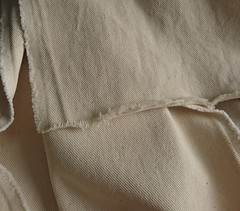
 |
| Joins are not too obvious - yay! |
My idea was that, if I could keep the "joins" to the underarm area, then they'd mainly go unnoticed to the non-sewist's eye. As I'd sliced the sleeve pattern sections in such a way that they'd be pretty much hidden on the underside of my arm I wasn't going to sweat to much over how it looked.
I just tried to match fabric pieces together with similar-ish colour/shapes to the main central sleeve section. And, I'm really happy with how they've turned out.
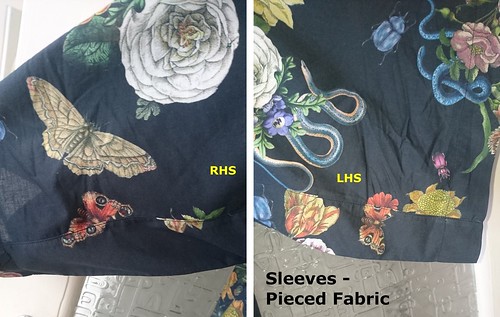 |
| Finished sleeves - please excuse the creases! |
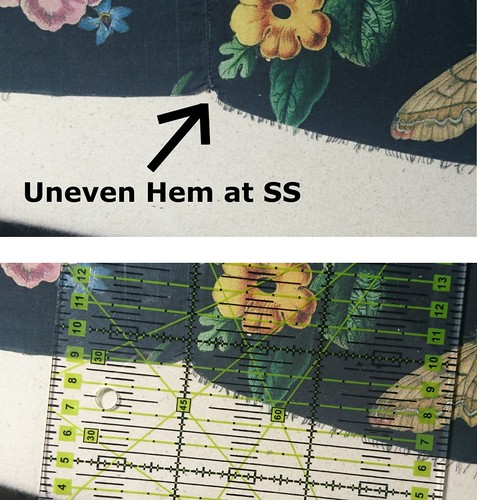
Also, I found that the hemline where the the front transitions to the back - at the bottom of the SS was uneven. It made it a tiny bit harder to press up my overlocked hem. For thicker fabrics, you'd want to clip a little, or may true the pattern edge before cutting out. (I plan to true my pattern for future makes).
Pattern alterations or
any design changes you made:
The only problem I encountered, was with the pattern drafting on the back neckline edge. After I had French-seamed the shoulders and pressed the SA, I noticed that there was too much fabric left there. So, I used a French Curve ruler to true the cutting line, marking it with a chalk Chaco Liner Pen. Then, I trimmed the fabric back before continuing with the construction unheeded.
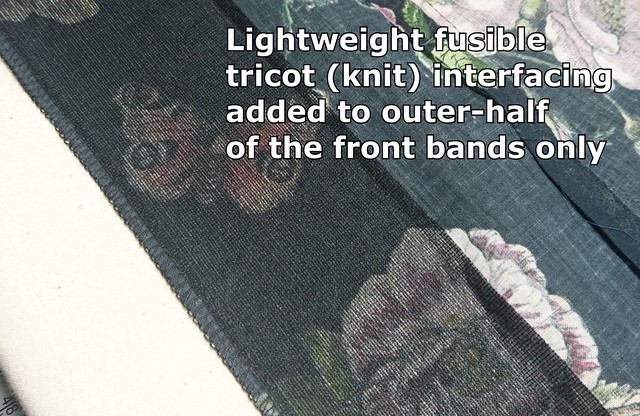
The instructions make no mention of using fusible interfacing at all. Which is probably unsurprising considering they recommend a wool mix tweed - which has more body, less drape and be stronger to the rigors of wear. As I used the Cotton Lawn I decided to add a little body, using my tricot iron-on interfacing and reinforcement to these areas:
- Top edge of Pockets on WS - I used 3cm depth pieces. This is so they'd not be too floppy, and so they'd not get worn out shoving my hands in/out all the time (oh how I do love pockets!).
- Front Bands - I interfaced down one (vertical) half of the bands only - on the outermost half. I didn't want weak, ripply bands (which can happen with very flimsy fabrics without any added interfacing sometimes). But, I also didn't want stiff cardboard-like bands either - so the soft body of the drapey tricot worked perfectly.
- Reinforcing WS where the pockets are attached - I used 2 small pieces of interfacing per pocket on the inside at the top - to stop any stresses tearing the fabric. Plus, I made some bar-tacks on the outside for good measure too. I felt that this was especially important on my lightweight fabric choice.
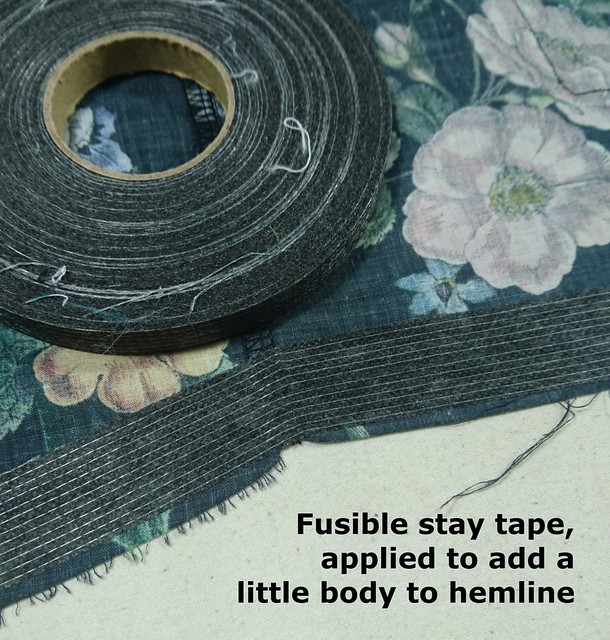
- Bodice Hemline - Here I fused on 2 rows of stay tape (I was being lazy, and it was easier than cutting a long, floppy stripe of tricot ha ha!). Again, as with the front bands - I didn't want a weak, ripply hemline. The stay tape gave a nice amount of body to the hem - without compromising drape of the rest of the jacket.
- Sleeve Hems - these I finished as per the instructions. So, no added fusibles here! I wanted them to be super floppy. The risk of too much body in the sleeve ends might make for a huge, giant arm effect (which I didn't want, haha!).
Would you sew it
again? Would you recommend it to others?:
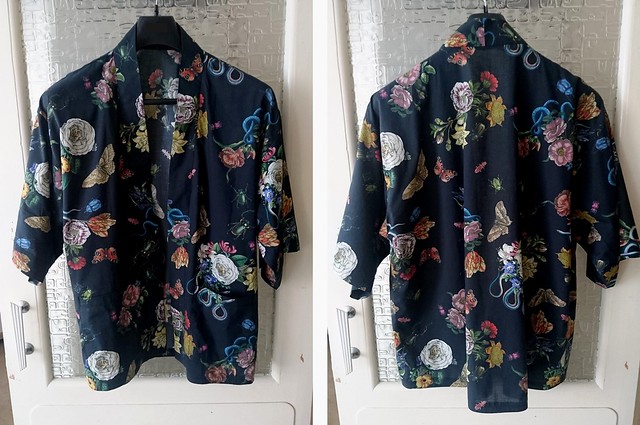
I really like the finished jacket! It'll be a great piece in my wardrobe for when summer finally arrives (LOL!). I think it suit my easy going style, and it works on my body shape too - I think it is fairly slimming on me even though the garment when laid flat is quite boxy and wide (it creates a sort of vertical stripe down the centre?).
My version matches the look of the finished length on the magazine's model pics - although I am also drawn to the longer version that my inspo Josie made too - so I might do that next time.
Also, instead of trimming back the neckline, I think that going forward I'll just make a quick correction to the front bodice pattern. I'll true the cutting line from the shoulder-neck-point (where the shoulder meets the back neckline) and blend the line down the front.
For future versions (and I do plan to make it again) I'll not do any French seams, nor Hong Kong finishes, nor Bias Binding on hems - I'll just overlock that stuff! And, I'll carry on stitching in the ditch for the front bands too. I'd also recommend reinforcing the WS of the jacket at the top of the pockets on either side the with fusible interfacing. This will give strength to those weak points and prevent tearing - this helps regardless of the fabric type you use. I'd also suggest truing up the pattern's cutting line on the front hemline - where it meets the back at the SS. These are steps I'd recommend to everyone looking to speed up making this cute jacket.
-------------------
Conclusion:
This is a simple jacket, easy to make - a perfect cover up for a floaty spring summer look. Something to throw in the sun without getting too hot (or sunburnt!).
--------------------
Key:
BP = Bust Point (aka Bust Apex).
CF = Centre Front.
RTW = Ready to wear.
SA = Seam Allowance.
SNP = Shoulder Neck Point.
SS = Side seam.
RS = Right Side.
WS = Wrong Side.


.jpg)


.JPG)


.jpg)


